3DSMAX DOCUMENTATION
- weldyf
- Jul 24, 2019
- 1 min read
first of all you need to open your Revit file, and export it to FBX file.

after importing Revit file to 3dsmax, we start with the positioning the daylight.

find the systems menu in the right side bar, and select daylight. start positioning your daylight.


after positioning daylight, we can proceed to interior and exterior cameras in the right side bar, click cameras and select target. you can arrange your camera in top and perspective view. don't forget click the select and move button, to move your camera around.
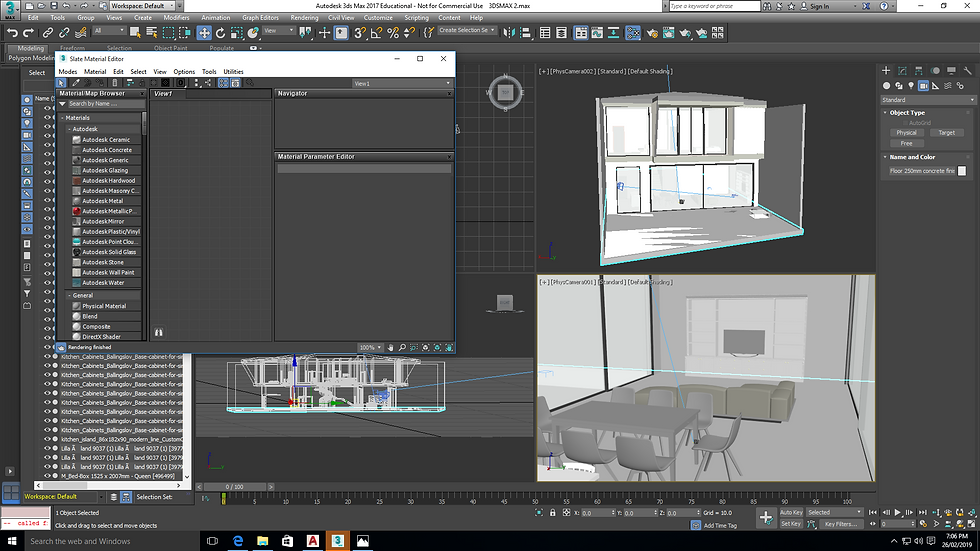
after arranging your cameras and daylight, we can start to apply material. click the wall or floor that you want to apply materials. after you click the floor or wall click M in your keyboard. it will show the slate material editor bar. click modes and select compact materia.

change the material/map browser from standard to arch and design.

after changing it to arch and design, click the material and map browser (beside colour) in diffuse tab and select bitmap

select the picture material that you can get in internet.

untick use real-world scale

Automatically the material will show on the ball, apply your material to the wall and floor that you want.


Comments